Many newcomers to the world of prepping know the problem: you want to be prepared, but your budget is limited. High-quality branded products sold in outdoor or military equipment stores often cost several hundred euros. Of course, quality has its price. But not everyone can or wants to dig that deep into their pockets.
The good news is that even inexpensive equipment can provide you with reliable support in an emergency - provided you know how to upgrade it properly. With a few tricks, small investments and a little creativity, you can turn a cheap item into a solid tool.
Why upgrades are often more important than new purchases
It is a misconception that only expensive equipment is viable. Premium and budget products often differ less in their basic function than in their durability, material strength or comfort. If you recognize these weak points and make targeted improvements, you can achieve an enormous improvement for little money.
An example: a cheap rucksack for 30 euros is not automatically unusable. But the seams could be weaker, the zippers could be jammed or the padding could be uncomfortable. With a little sewing thread, reinforcing tape and new zippers, it can suddenly last for years.
Basic principle: Know the weak point
Before you improve something, you should ask yourself: What do I really need this part for? and Where could it fail in an emergency?
This leads to three key questions:
- Resilience: Will the material withstand continuous use?
- Weatherproof: Is it water or heat resistant enough?
- Practicality: Is it easy to operate under stress?
Once you have the answers, you'll know where it's worth upgrading.
Concrete examples: How to upgrade cheaply
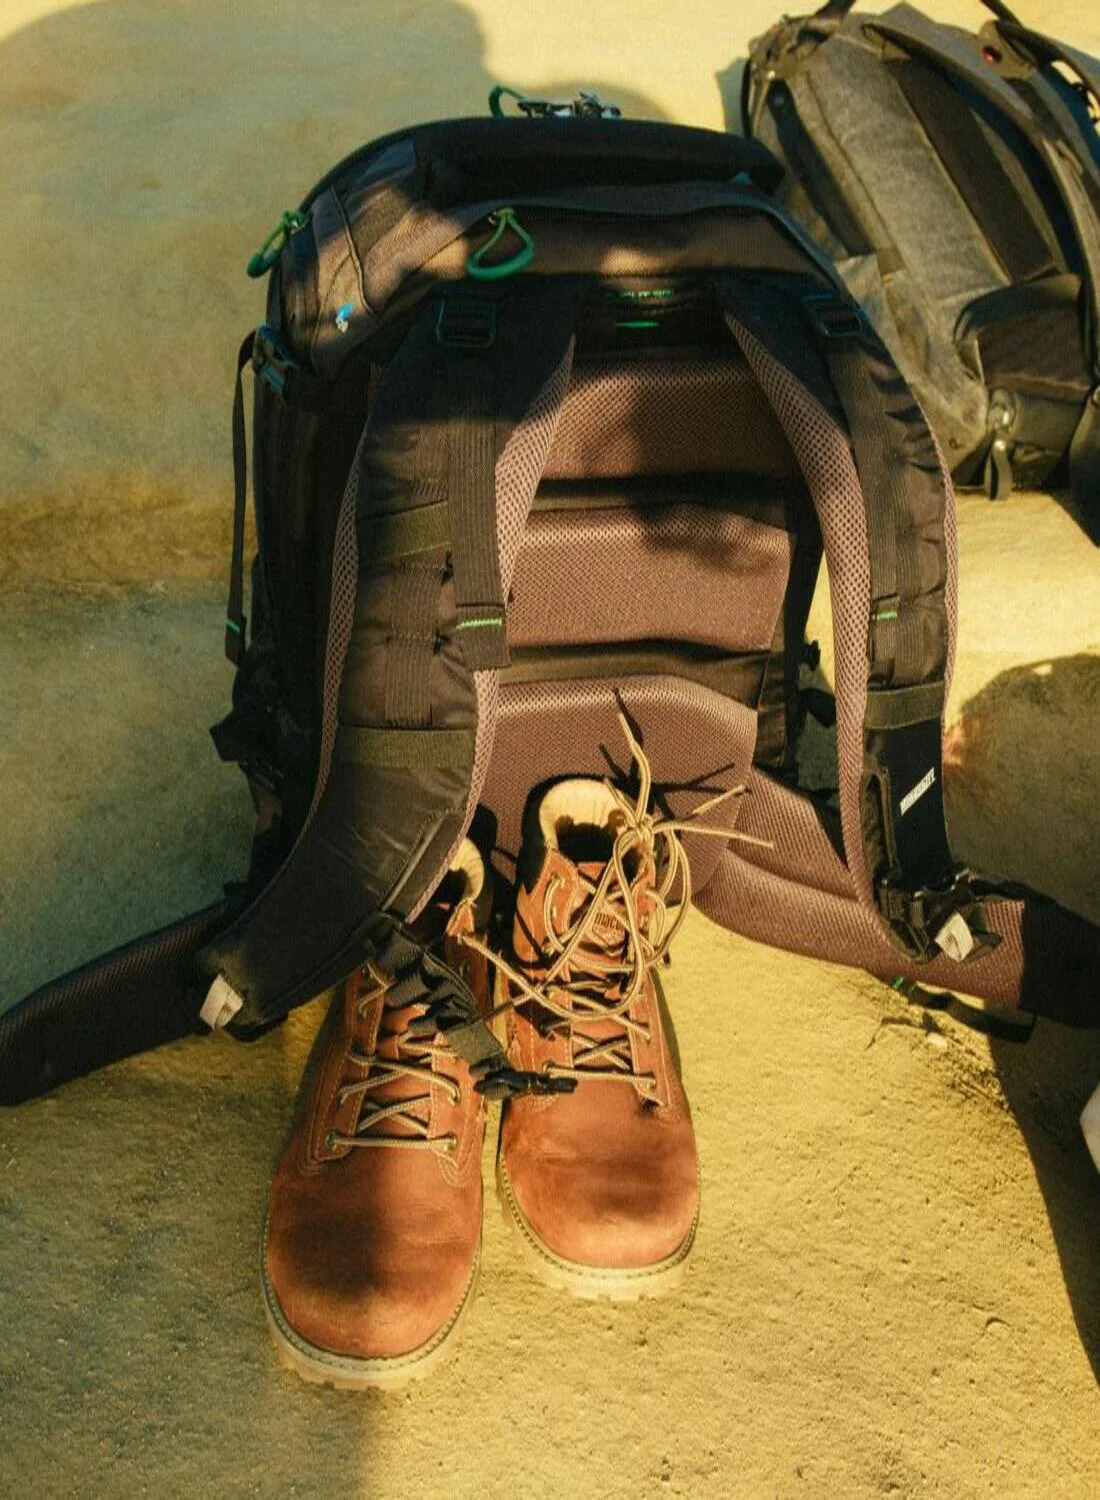
1. backpacks and bags
Cheap backpacks are often the weak point in the equipment. Typical problems: thin straps, poor zippers, weak seams.

Upgrades:
- Sew seams with strong thread or reinforce with seam tape.
- Replace zipper pulls with paracord loops (easier to grip).
- Improve waterproofness: Use waterproofing spray or an inexpensive drybag.
- Increase comfort: Cut out foam pads from old yoga mats and sew them to the shoulder straps.
2. sleeping bags and blankets
Cheap sleeping bags often provide poor insulation and are not weatherproof.
Upgrades:
- Wrap a rescue blanket around the outside or lay it inside to increase heat retention.
- Use sleeping bag in combination with fleece blanket - increases insulation without much weight.
- Replace the drybag with a waterproof drybag.
3. knives and tools
Not everyone can afford an expensive survival knife. A cheap kitchen knife or discount knife can still be useful.
Upgrades:
- Sharpen the blade and maintain it regularly.
- Wrap the handle with paracord for a better grip and additional rope cord.
- Replace cheap plastic sheaths with self-made ones made of leather or Kydex.
4. cookware and stove
Light pots and pans from discount stores are often not sturdy enough.
Upgrades:
- Clean the inside of cheap pots with fine steel wool and then lightly oil them to prevent rust.
- Buy additional pot tongs to replace unstable handles.
- Build your own can stove or wood gasifier - often more robust than some cheap stoves.
5. clothing
Almost everyone has cheap outdoor jackets or shoes in their wardrobe that aren't perfect.
Upgrades:
- Treat jackets with waterproofing spray.
- Reinforce buttons or Velcro fasteners.
- Upgrade shoe soles with insoles - comfort and insulation increase enormously.
- Insert replacement laces made of paracord (more durability and additional function).
Table: Cheap product vs. upgrade
| Equipment | Cheap version - weak point | Upgrade option |
| Backpack | Thin straps, weak seams | Re-sew, add upholstery, spray |
| Sleeping bag | Poor insulation | Rescue blanket, fleece insert |
| Knife | Cheap sheath, blunt blade | Sharpening, paracord handle, new sheath |
| Cooker/pots | Unstable handles, rust | Pot tongs, care, do-it-yourself stove |
| Clothing/Shoes | Wet conditions, lack of comfort | Waterproofing, insoles, paracord laces |
Creativity beats budget
Many upgrades cost almost nothing if you tinker a little. A piece of paracord, a strip of tape, a cut-off yoga mat - small everyday items can make all the difference.
An example: I have equipped my cheap DIY store rucksack with old carabiners, additional hip padding and self-sewn belt extensions. Price: barely more than 15 euros. Durability: now three years, used regularly.
Limits to armament
Of course there are limits. A 10-euro tent from the discount store won't be a storm-proof expedition tent, even after upgrades. But it can be enough for a night in the forest, combined with a tarpaulin if necessary.
The trick is to differentiate: What can be improved with little effort, and where should I invest for the long term?
Example of long-term investment: Good shoes.
Because if your feet have to carry 30 kilometers in an emergency, even improvised insoles won't help if the sole breaks.
List: When is an upgrade worthwhile, when not?
Upgrade useful for:
- Backpacks (seams, padding, zippers)
- Knives (sharpening, improving handles)
- Cookware (care, additional holders)
- Clothing (impregnation, reinforcements)
New purchase makes sense:
- Shoes (quality determines the health of the feet)
- Water filter (cheap models are often risky)
- Tents (if it really has to be weatherproof)
- Medical equipment (safety before savings)
Conclusion - making a lot out of a little
Prepping does not mean having the most expensive equipment. It means being able to act. Learning to upgrade inexpensive equipment not only sharpens your equipment, but also your eye for the essentials.
Perhaps this is precisely the most important lesson: it's not the brand that counts, but your ability to make the best of what you have. And that is ultimately one of the most valuable qualities you can have as a prepper.
Because you can buy equipment. Improvisation, creativity and pragmatism - you have to practice them.